
There are several ways to add beads to your knitting without having to pre-string your beads beforehand. Some people add beads using a tiny crochet hook, others swear by Oral B Superfloss. I will be giving step by step instructions for using both these methods of attaching beads to your knitting, starting with the Superfloss method in this post. The tutorial to add beads using a tiny crochet hook can be found here.
Superfloss, what Superfloss?
You’ll be needing:
- Your knitting: yarn + needles
- Beads in a size that fit your yarn: for fingering weight yarn you can use size 8/0 or 6/0 beads
- A piece of Superfloss (see below)
I have no idea who came up with the idea of using dental floss for beading, but there’s no point in denying — it just works. Personally, I find it to be particularly useful when working with beads on the go, because there’s less chance of spilling beads all over the place.
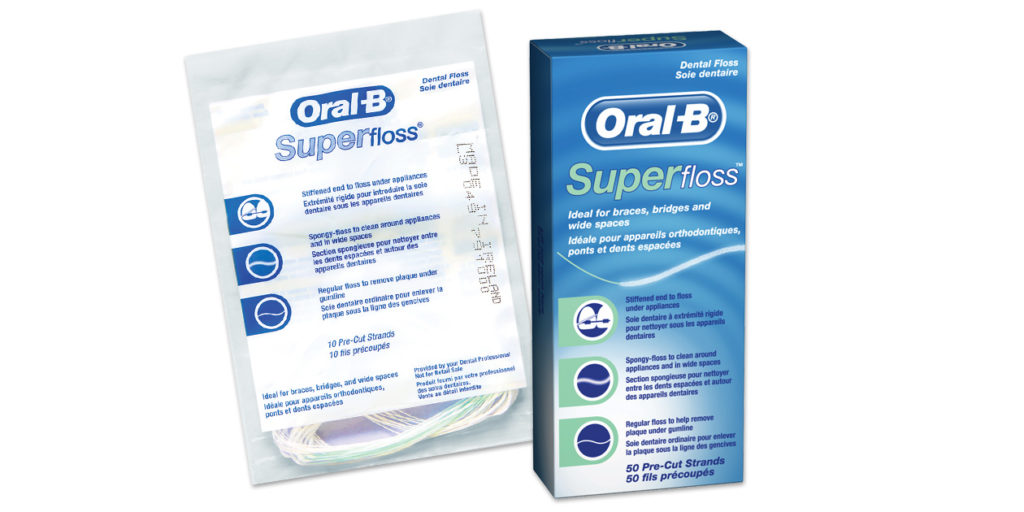
So, what is this magical Superfloss that I’m talking about? Well, it’s a dental hygiene product that can be found in most pharmacies and grocery stores. It seems to be quite common both in Europe and the US. Just google Oral B Superfloss and I’m sure you’ll find a place to order it online too.
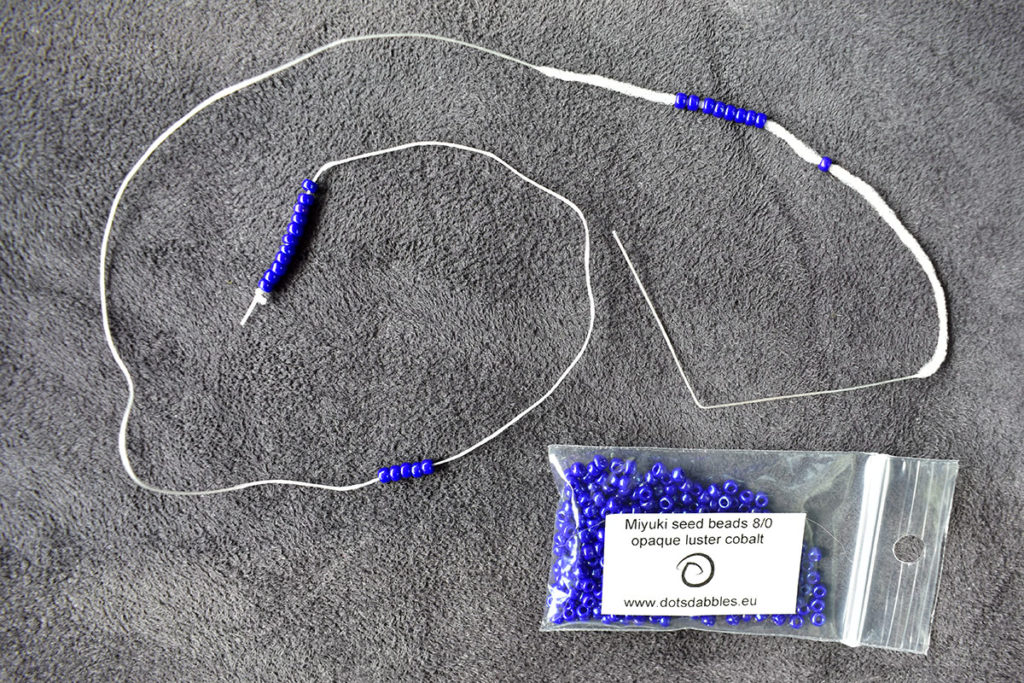
How does it work? Before you can start adding beads to your knitting, you need to pre-string a number of beads on your thread of Superfloss. See how the thread is all pointy on one side? That’s where you add the beads, but make sure to tie a knot at the other end of your thread first! Otherwise your beads will just slide off.
I’m pretty sure a single thread can hold over a 100 size 8/0 seed beads. Usually, I pre-string beads until the thread is about halfway full, but it depends on how many beads I will need for the project that I’m working on. Just don’t add beads past the thicker, fluffy bit because then they’ll just slide off again.
Do you see the fluffy part of the Superfloss that’s slightly thicker than the rest? That’s where I normally keep a small number of beads that I know I will need in the next couple of rounds.
As you can see the pointy end has got a bend in it in the picture above. It’s completely normal if your shiny new thread doesn’t! The bend only starts forming when you’ve used the thread for beading. The thread in the picture above has been used for multiple beaded knitting projects already.
Now, we’re ready to start knitting!
Let’s add those beads

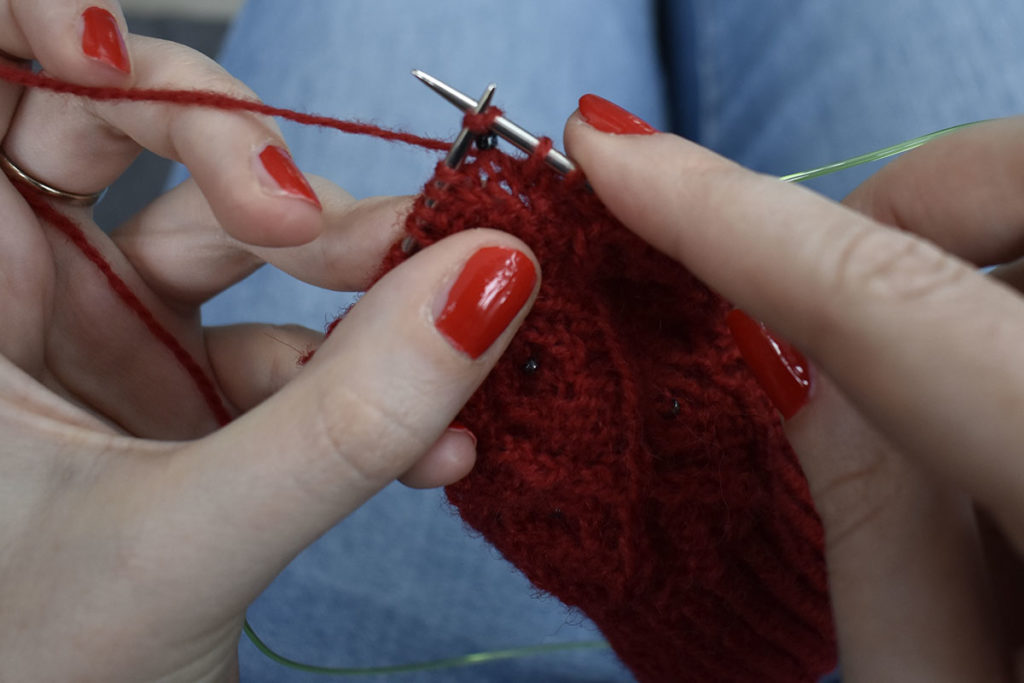
First, knit to the stitch where you want to place your beads.
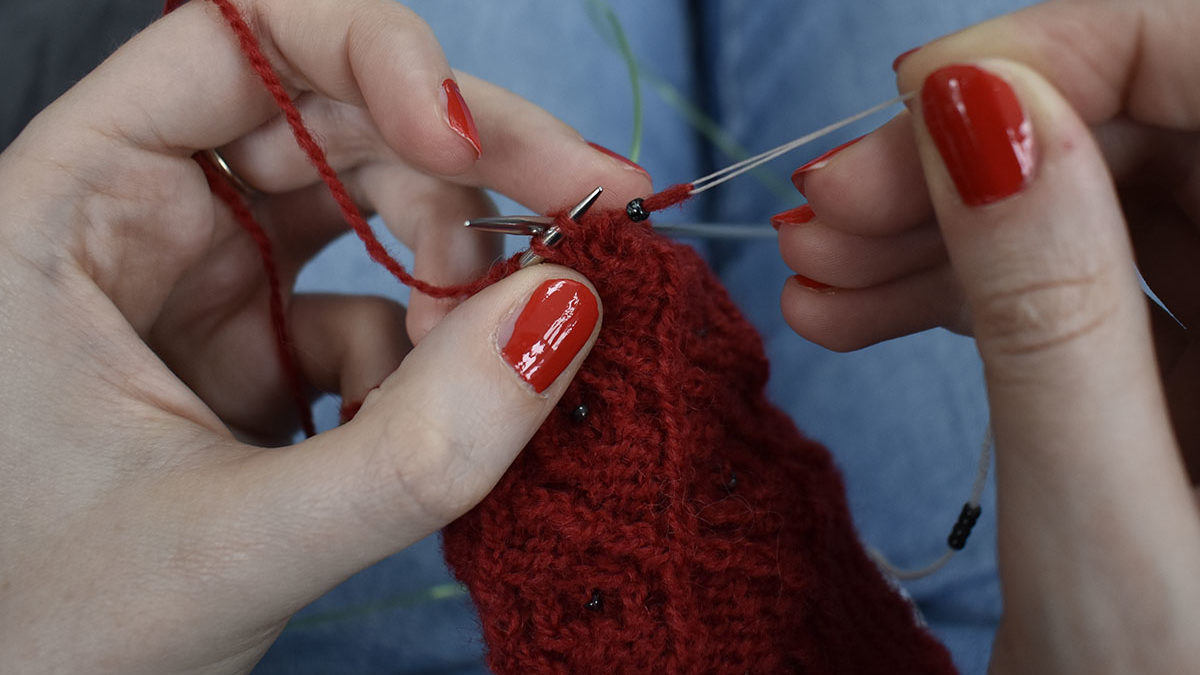
Next, insert the pointy end of your Superfloss from right to left (purlwise) into the stitch you want to place a bead on. Bend the pointy end more or less in the middle.
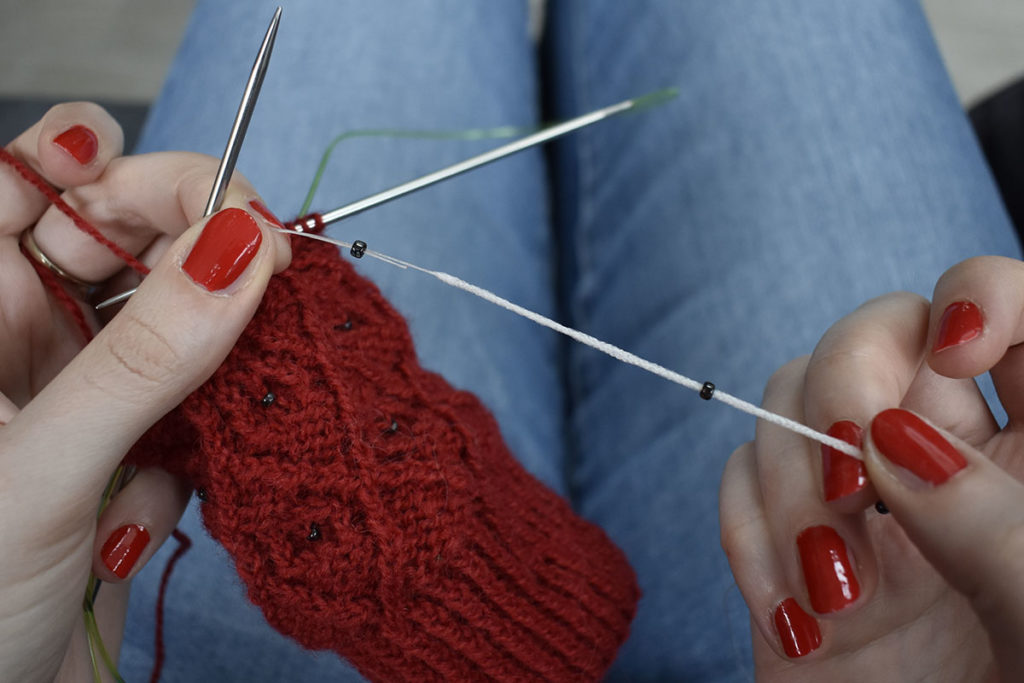
After that, slide a single bead toward the bended pointy end and slide it over both threads.
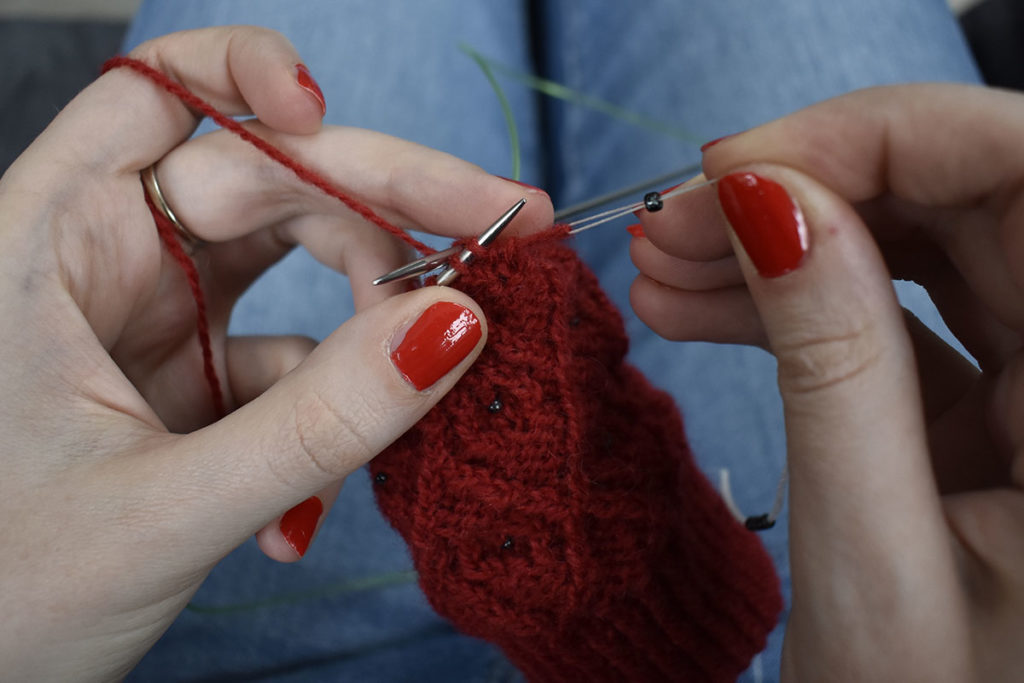
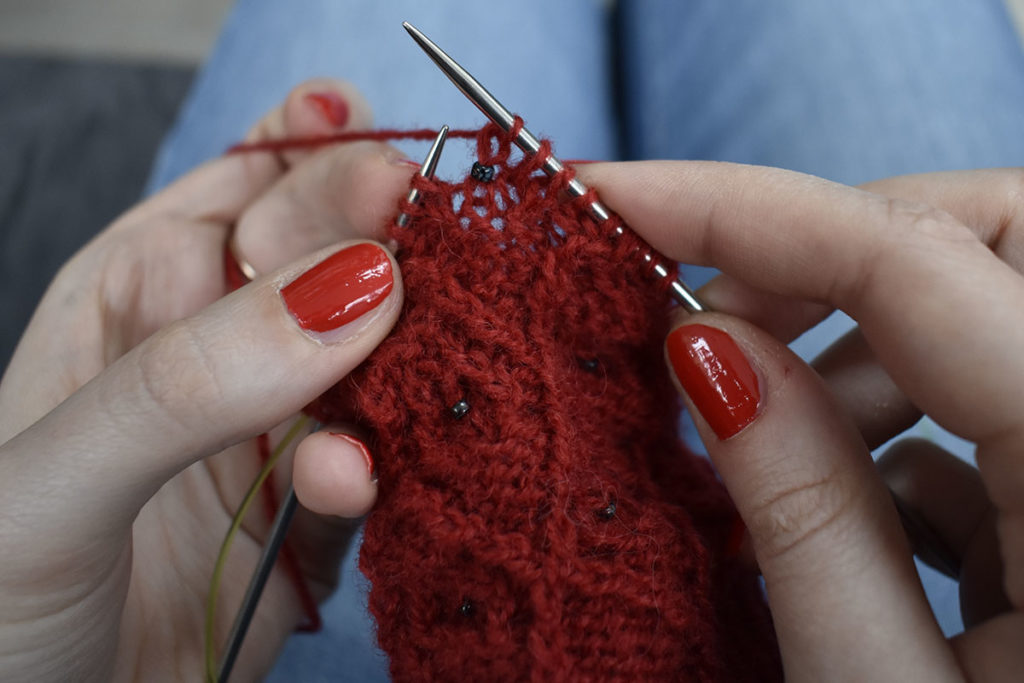
Then pull the stitch from the righthand needle and hold it tight by pulling at the Superfloss thread. Shift the bead towards the stitch.
Next, pull the bead over the stitch and keep holding the Superfloss thread.
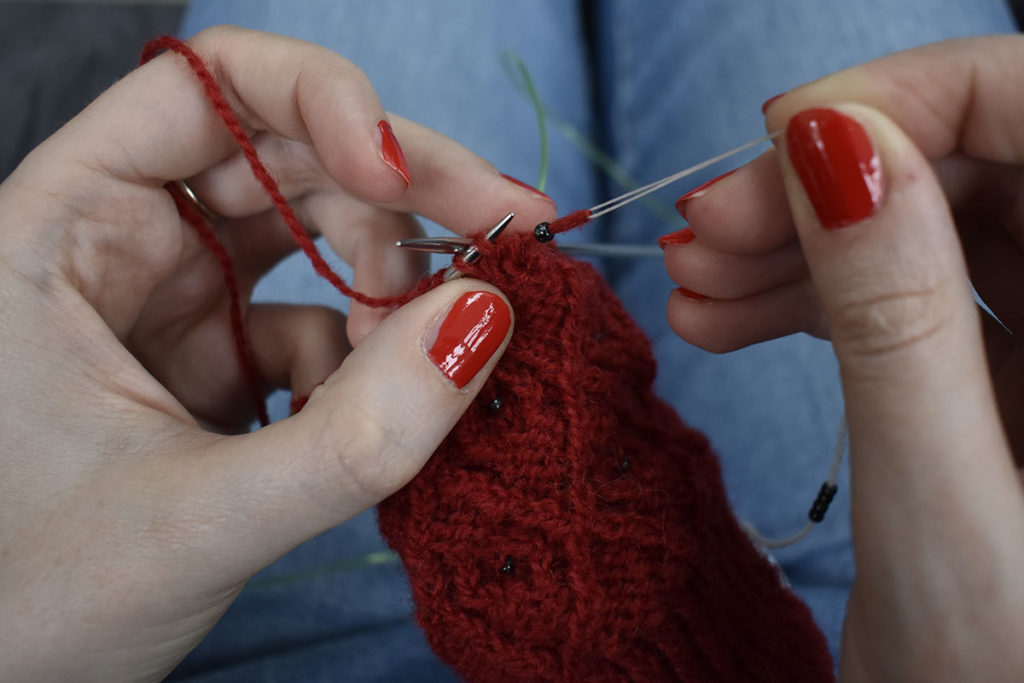
Finally, place the stitch back on the righthand needle while still holding the Superfloss. Once the stitch is placed back on the needle you can gently pull the thread of Superfloss away from the stitch. As you can see, a bead is now placed on your stitch!
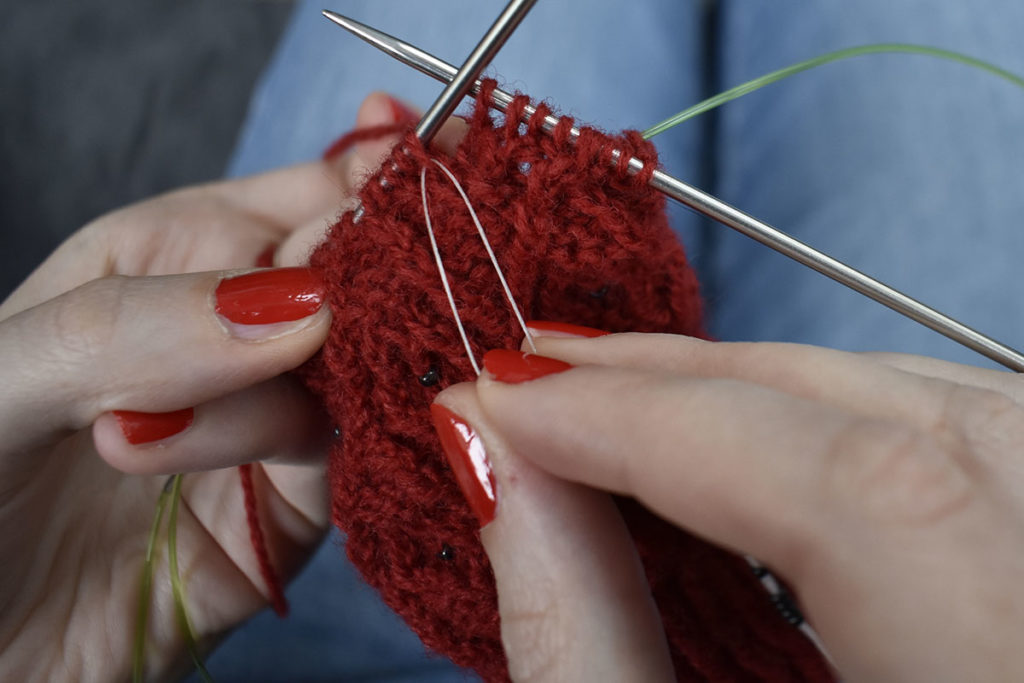
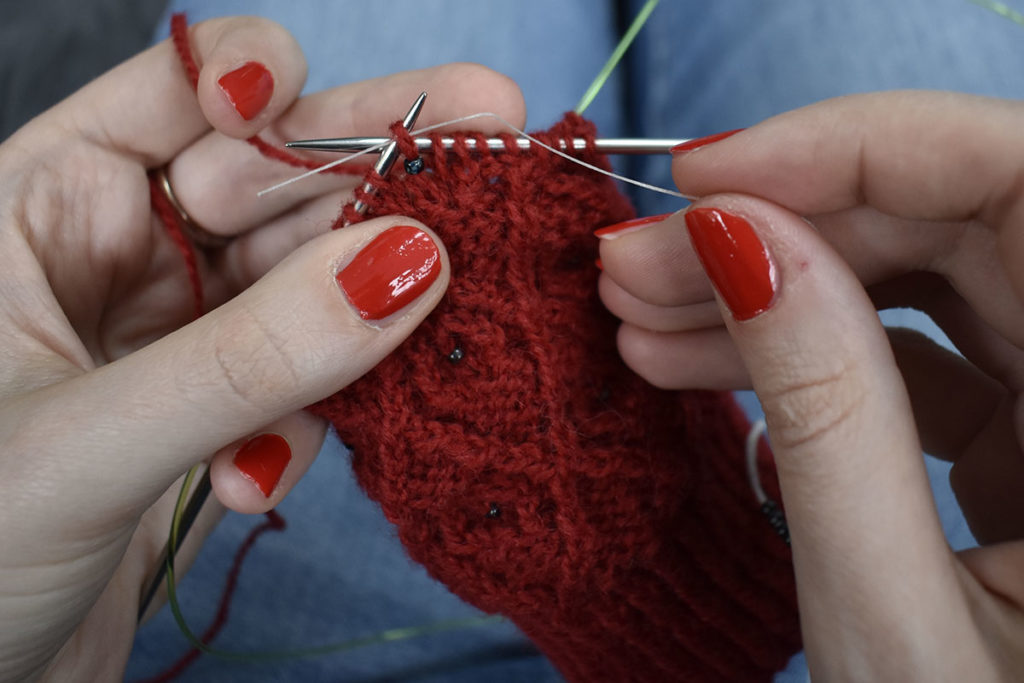
Depending on the pattern, instructions might just leave it at that or you might have to add a knit stitch on top of the bead. Some patterns even let you knit the stitch before you place the bead. Personally, I find the bead sits better when you first place the bead and then have a knit stitch on top of it.
I just knit the beaded stitch as I would knit any other stitch.
And that’s that! A beautiful bead placed on your knitting!
Now go practice this skill on some of my beaded patterns, like Elvenpath, Gothic Arches or Beaded Arches.
Continue with part 2 if you want to know more about placing beads using a crochet hook.
The pattern used in this tutorial is Beaded Arches. The yarn is Tukuwool Fingering in Leimu. The beads are Miyuki size 8/0 seed beads in Opaque Black. The needles are HiyaHiya fixed steel circulars.
If you like this tutorial, please subscribe to my newsletter to hear about my latest blog posts, tutorials, and pattern releases. You can also follow me on Instagram or Facebook.
