
Welcome back for part 2 in our beads series in which we’ll be adding beads to our knitting using a small crochet hook! If you’ve missed the first tutorial on how to add beads with Superfloss, you can read up on it here.
Grab those hooks
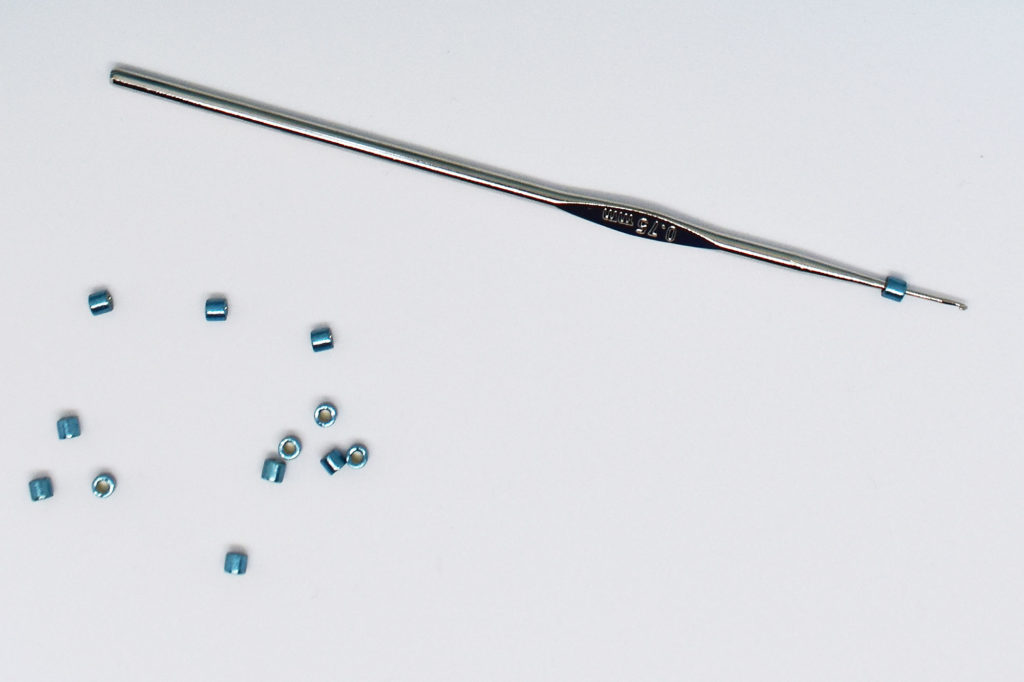
In this tutorial I am going to give step by step instructions on how to attach beads to your knitting using a tiny crochet hook. And when I say tiny, I mean tiny. I normally use a 0.75 mm or US size 14 crochet hook when working with size 8/0 beads. If you’re working with size 6/0 beads you might get away with a 1 mm or US size 12 crochet hook, depending on the brand of beads you are using.
You’ll be needing:
- Your knitting: yarn + needles
- Beads in a size that fit your yarn: for fingering weight yarn you can use size 8/0 or 6/0 beads
- Something to hold your beads: for instance a small bowl
- A tiny crochet hook that fits in the hole of your beads: 0.75 mm or size 14 for size 8/0 beads (see above)

Let’s add those beads
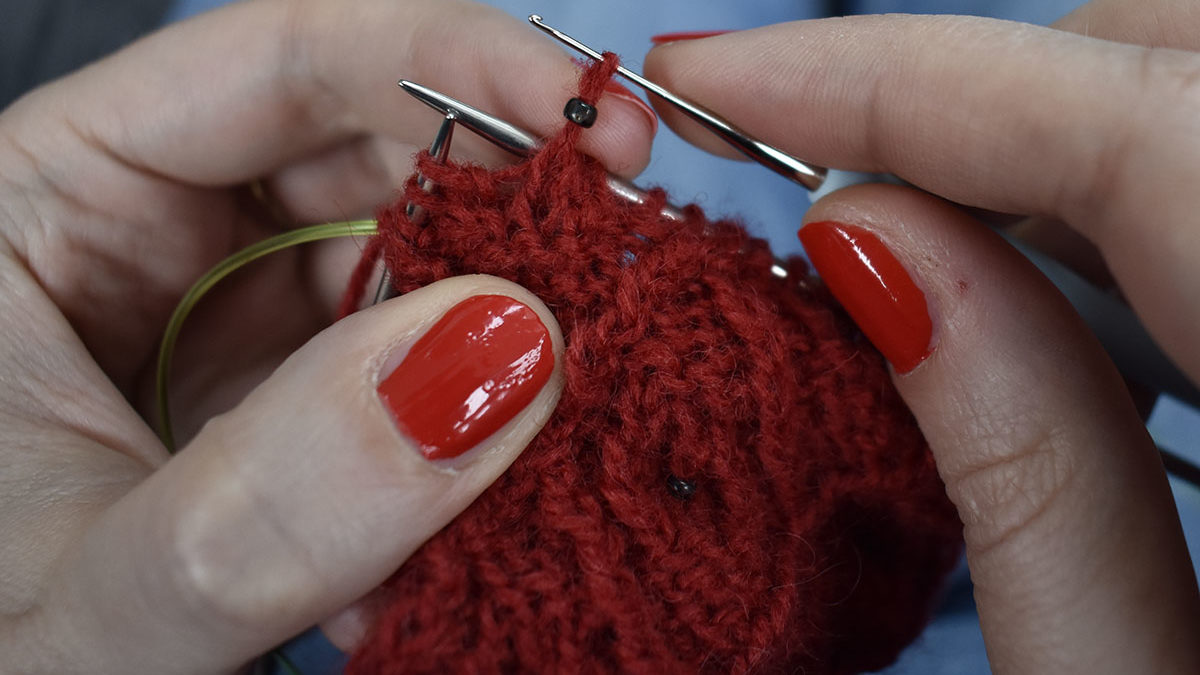
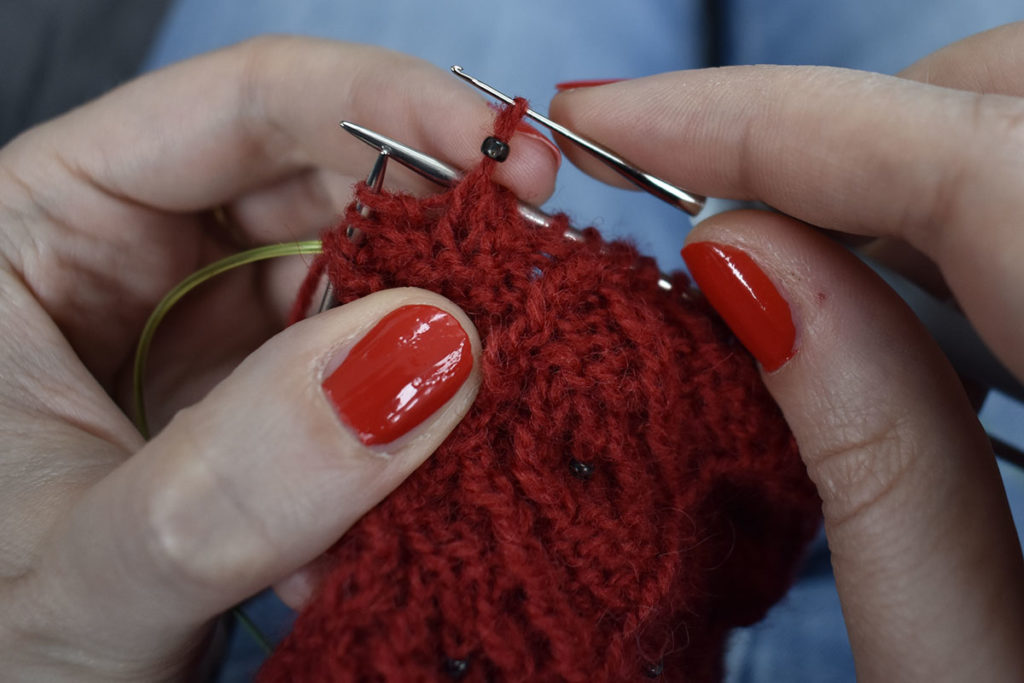
First you knit up to the point where you want to add your first bead. Then, you place a bead on your crochet hook.
After that, you insert your crochet hook into the stitch you want to place your bead on from the right to the left (purlwise).
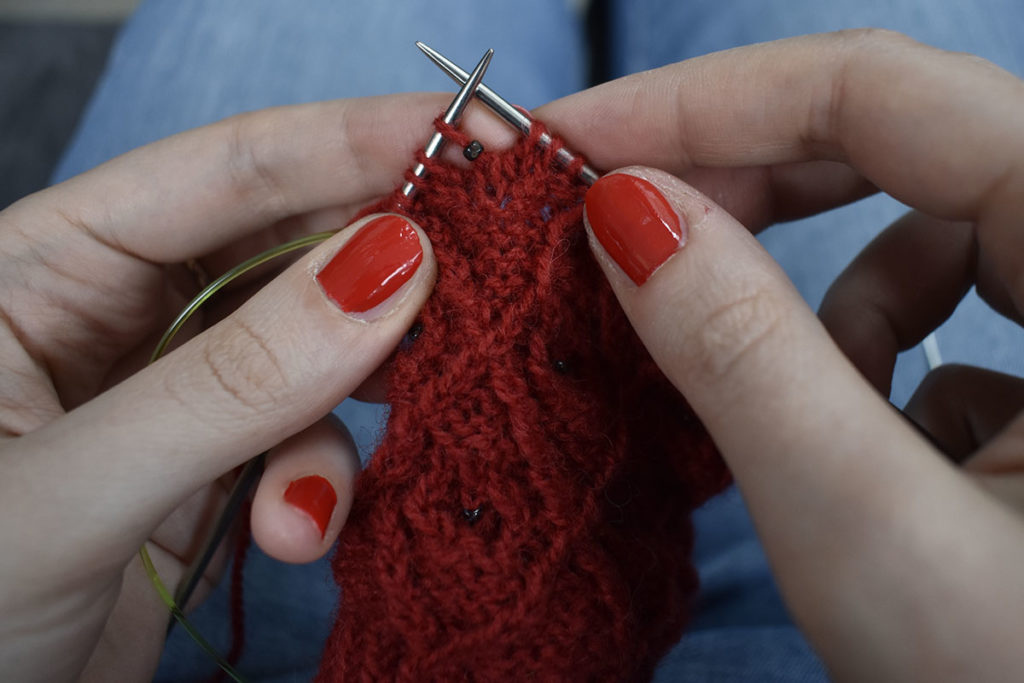
Next, you pull the stitch off your knitting needle and hold it using the crochet hook.
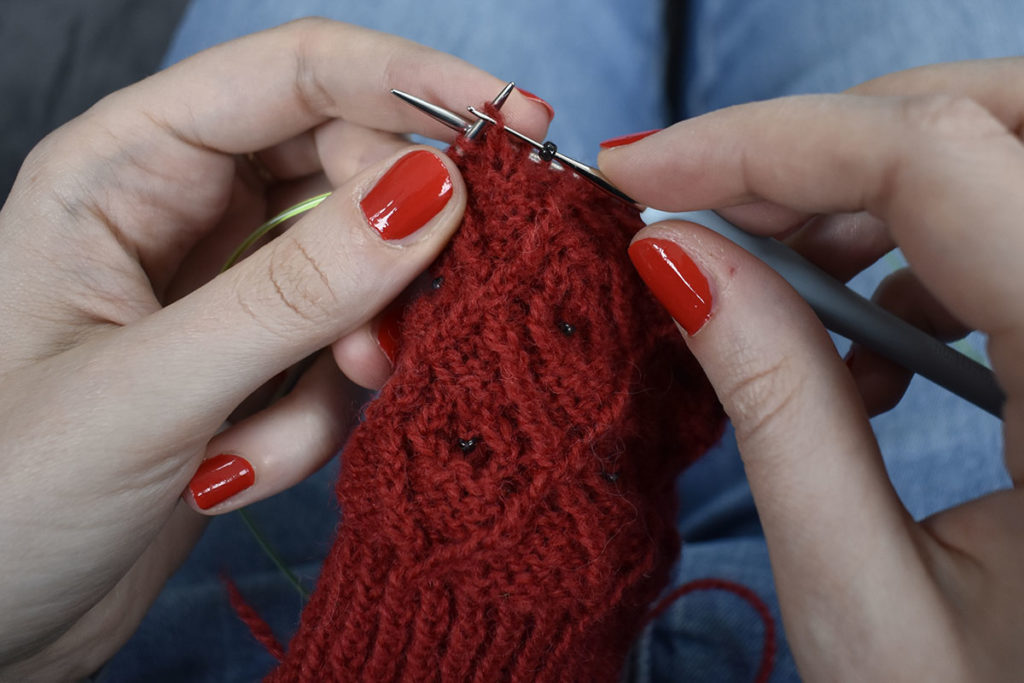
Then it can get a wee bit tricky. You slide the bead over the stitch by pulling the stitch tight with your crochet hook. Depending on your yarn, the size of your crochet hook, and the size of your bead, you might have trouble to slide the bead over the entire stitch without splitting the yarn. However, it’s very important not to leave any yarn dangling next to the bead.
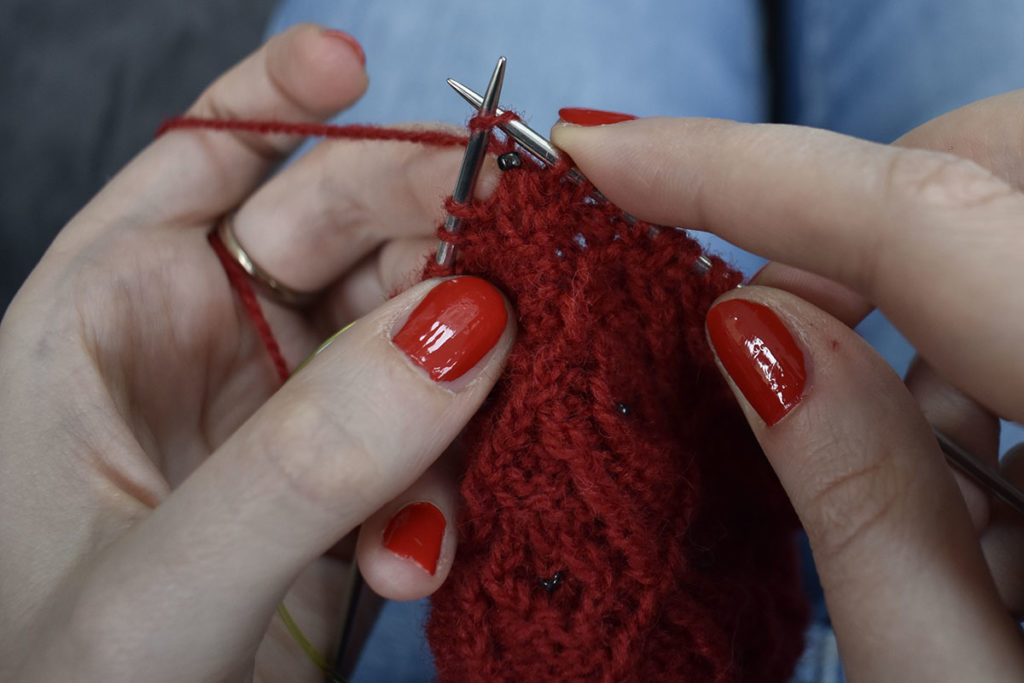
As you can see, the bead is now placed on the stitch! After that you can place the stitch back onto the right hand needle.
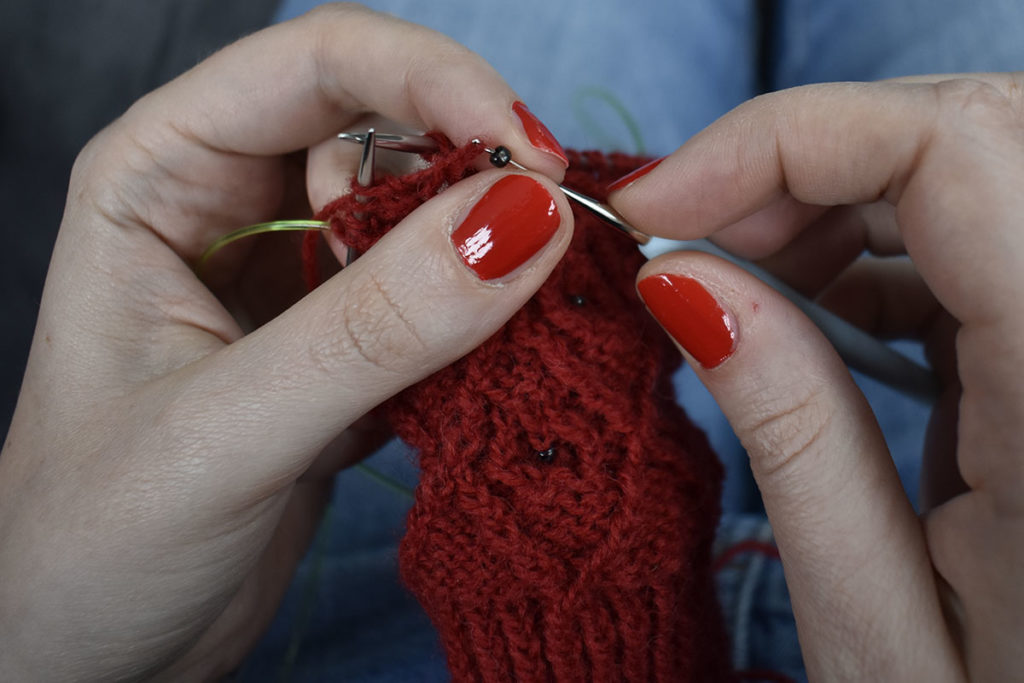
Depending on the pattern, instructions might just leave it at that or you might have to add a knit stitch on top of the bead. Some patterns even let you knit the stitch before you place the bead. Personally, I find the bead sits better when you first place the bead and then have a knit stitch on top of it.
I just knit the beaded stitch as I would knit any other stitch.
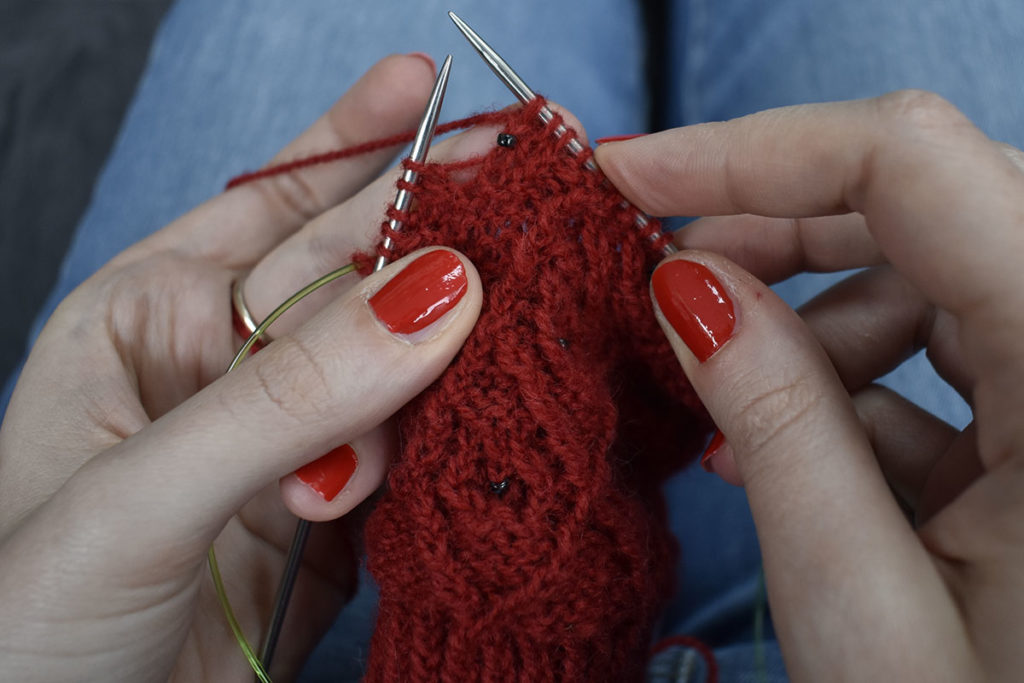
Tadaah! Now you have a beautiful bead placed on your knitting!
Now go practice this skill on some of my beaded patterns, like Elvenpath, Gothic Arches or Beaded Arches.
The pattern used in this tutorial is Beaded Arches. The yarn is Tukuwool Fingering in Leimu. The beads are Miyuki size 8/0 seed beads in Opaque Black. The needles are HiyaHiya fixed steel circulars and the crochet hook is form Clover.
If you like this tutorial, please subscribe to my newsletter to hear about my latest blog posts, tutorials, and pattern releases. You can also follow me on Instagram or Facebook.
