
In this tutorial we’ll be reviewing a technique to knit right leaning cables without a cable needle. A tutorial on working left leaning cables without a cable needle can be found here.
The main advantage of working cables without a cable needle is that it’s faster and more efficient than the traditional method of knitting cables, because you don’t need to pick up that pesky little cable needle whenever you want to cross a cable.
You’ll be needing:
- Your knitting: yarn + needles
- A cable pattern containing right leaning cables. In this tutorial I’ll be using a 4 stitch cable
Let’s cable without a cable needle
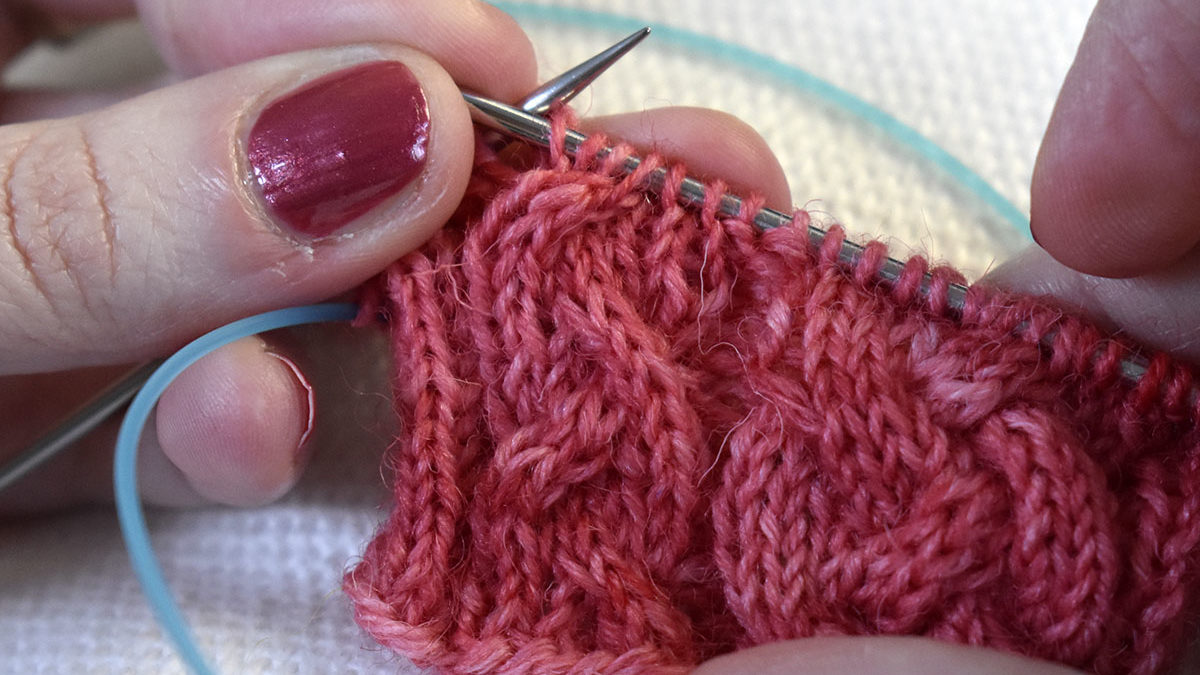
To make a 2/2RC (4 stitch right leaning cable) you need to follow the next 4 steps:
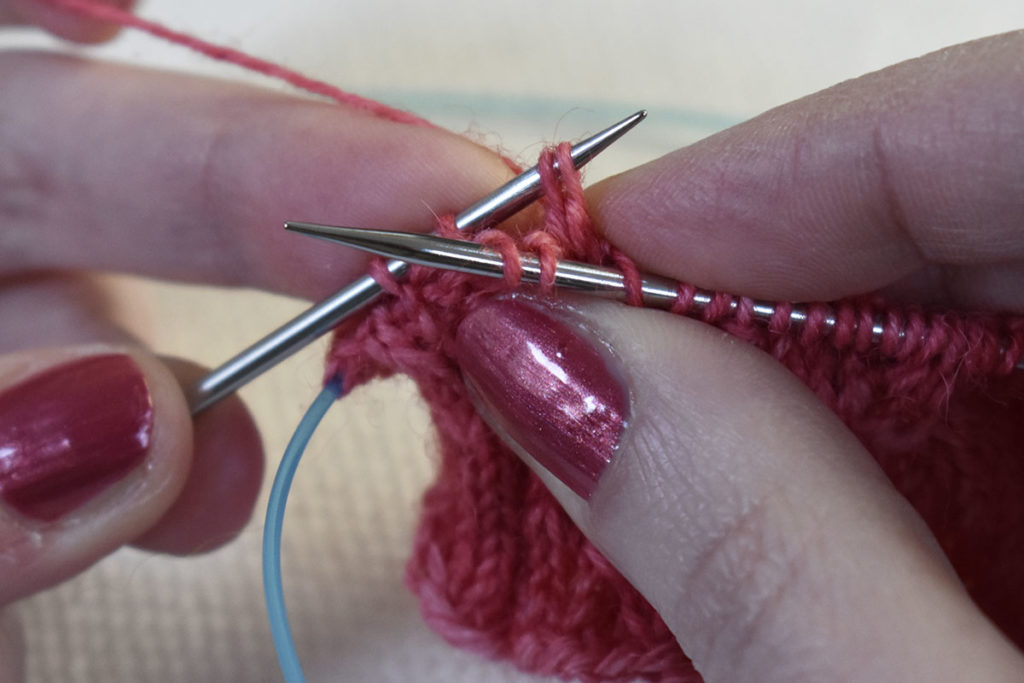
1) First, insert your right hand needle into the 3rd and 4th stitch on your left hand needle in the front of the stitches, from right to left
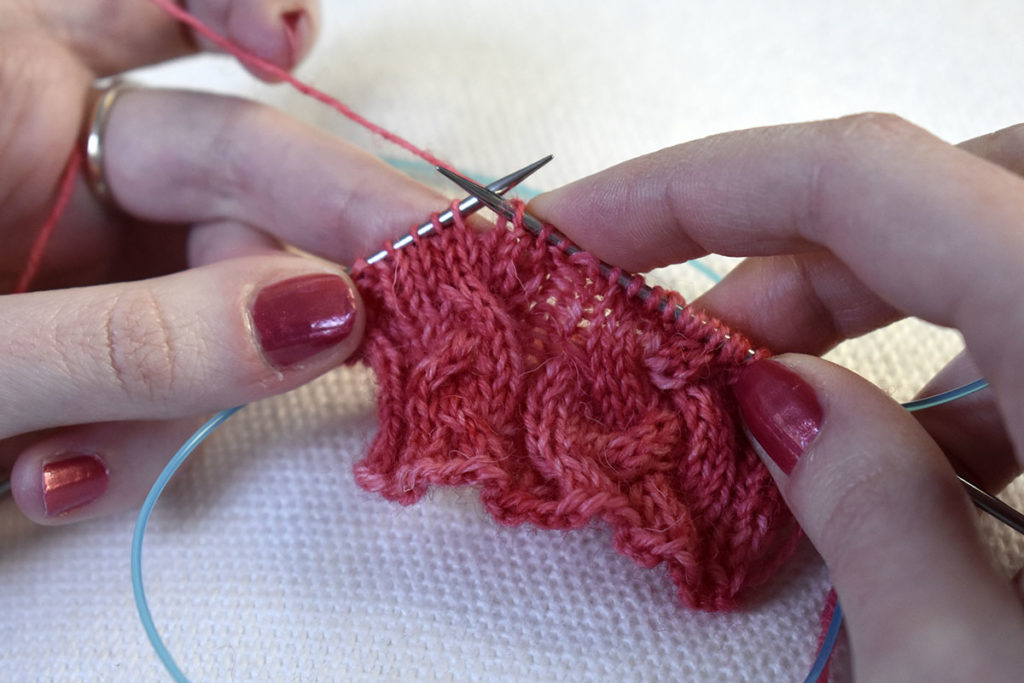
2) Then, take the 1st 2 stitches from your left hand needle and pinch them. The next 2 stitches will now be on your right hand needle
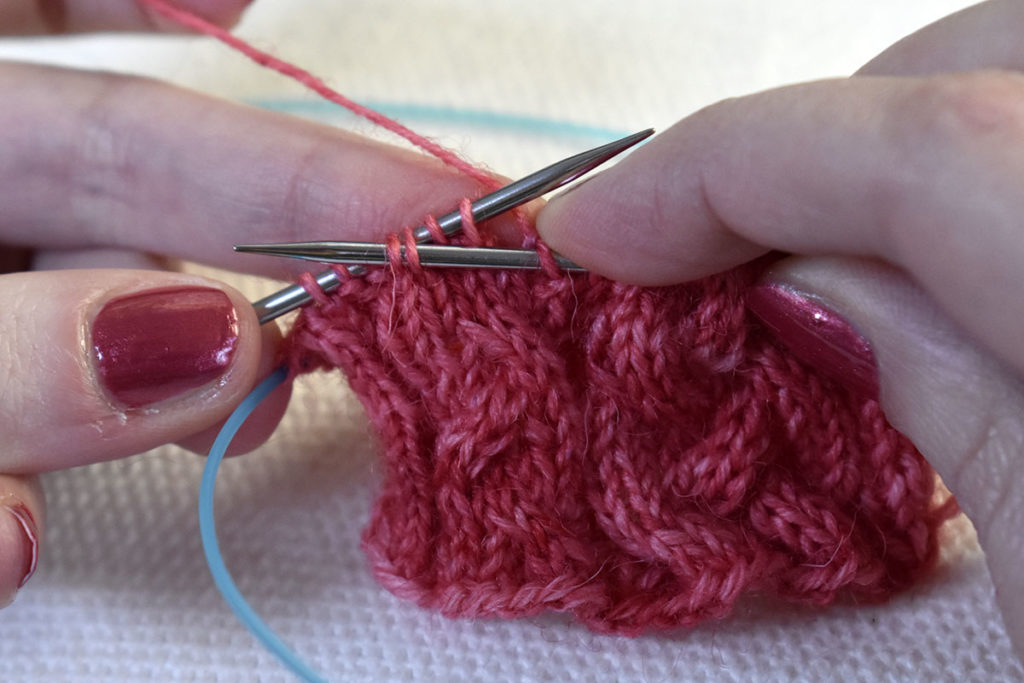
3) Next, place the pinched stitches back on your right hand needle.
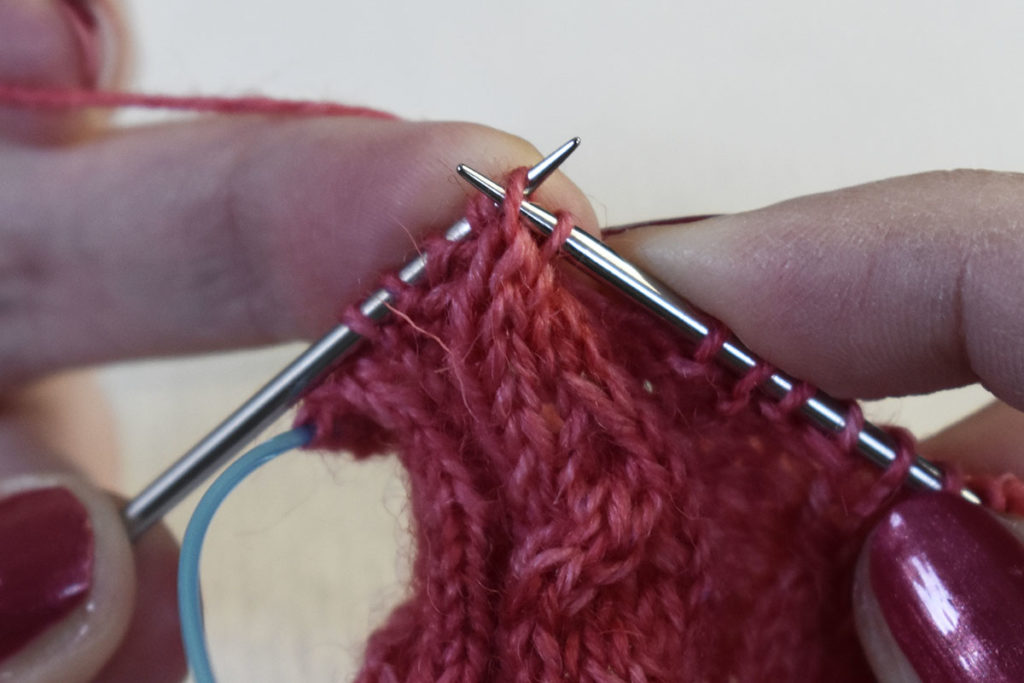
After that, place the 2 unworked stitches from your right hand needle to your left hand needle

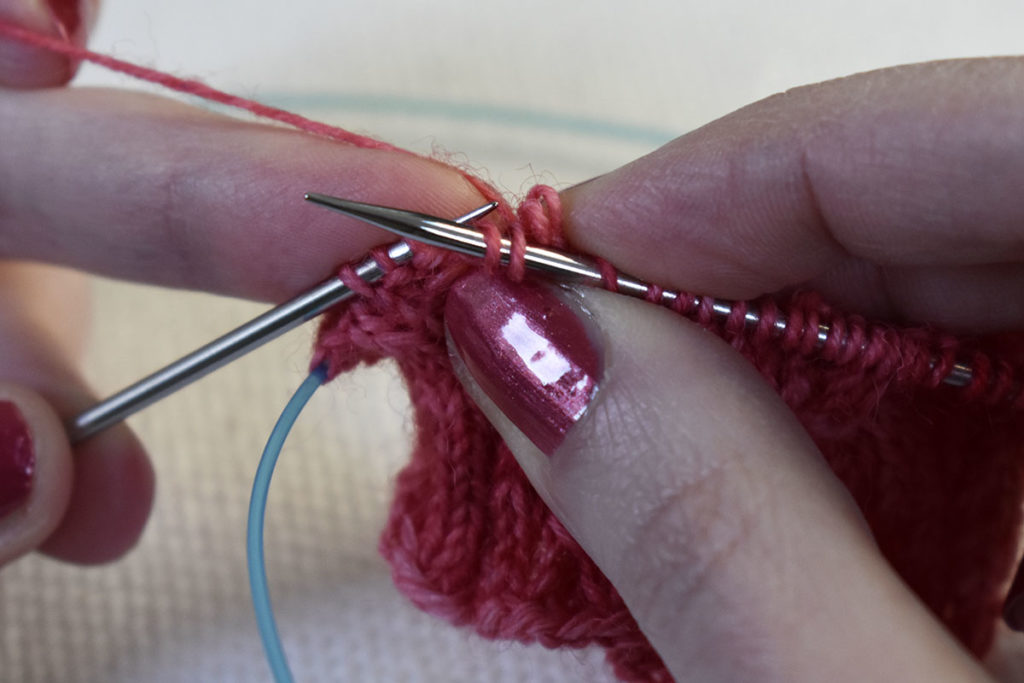
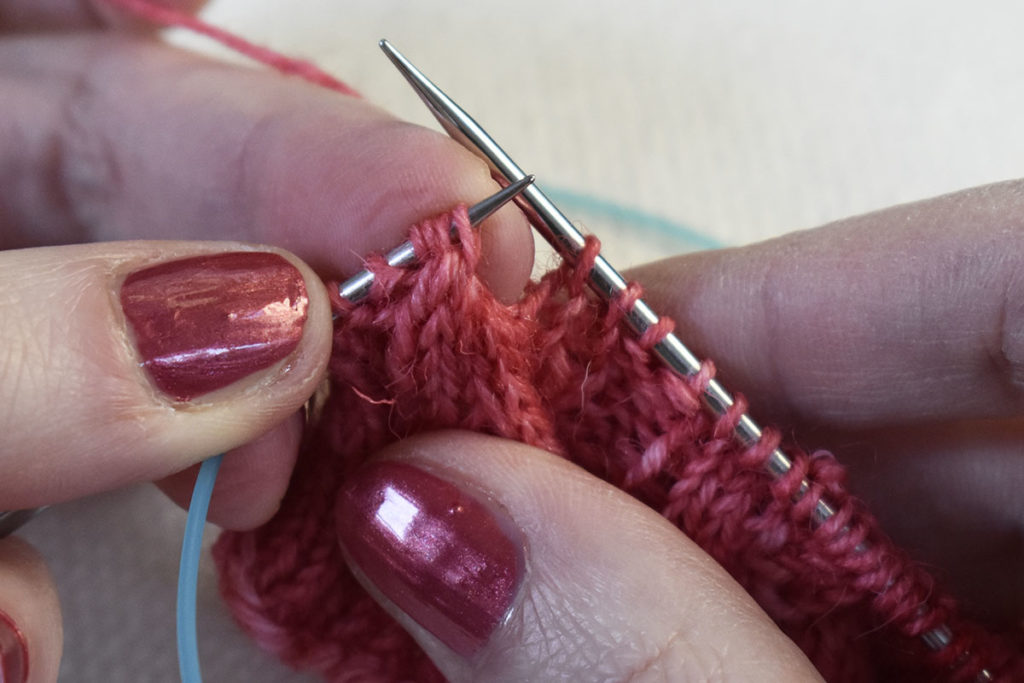
4) Finally, knit the next 4 stitches on your right hand needle
Congrats! You have now successfully worked your 2/2RC
Other right leaning cables
This technique can easily be adapted to other types of right leaning cables like 1/1RC, 1/1RPC, 1/1TRC, 2/1TRC, etc. Just make sure that you substitute the knit stitches by ktbl or purls when necessary, and slip the right amount of stitches.
Here’s a little overview:
| Cable | Instructions with cable needle | Instructions without cable needle |
| 1/1TRC | Sl1 to CN at back, ktbl1, ktbl1 from CN | First, stick RHN in front of 2nd st on LHN from right to left. Then, take 1st st from LHN and pinch. After that, shift 2nd st to RHN. Next, place pinched st back on LHN and place 1st st from RHN back to LHN. Finally, ktbl2 |
| 1/2RC | Sl1 to CN at back, k2, k1 from CN | First, stick RHN in front of 2nd and 3rd st on LHN from right to left. Then, take 1st st from LHN and pinch. After that, shift 2nd and 3rd st to RHN. Next, place pinched st back on LHN and place 1st 2 sts from RHN back to LHN. Finally, k3 |
| 1/3RPC | Sl1 to CN in back, k3, p1 from CN | First, stick RHN in front of 2nd, 3rd and 4th st on LHN from right to left, take 1st st from LHN and pinch. After that, shift 2nd, 3rd and 4t st to RHN. Next, place pinched st back on LHN and place 1st 3 sts from RHN back to LHN. Finally, k3, p1 |
| 2/1RC | Sl2 to CN at back, k1, k2 from CN | First, stick RHN in front of 3rd st on LHN from right to left, take 1st 2 sts from LHN and pinch. After that, shift 3rd st to RHN. Next, place pinched st back on LHN and place 1st st from RHN back to LHN. Finally, k3 |
| 2/2RC | Sl2 to CN at back, k2, k2 from CN | First, stick RHN in front of 3rd and 4th st on LHN from right to left, take 1st and 2nd st from LHN and pinch. After that, shift 3rd and 4th st to RHN. Next place pinched sts back on LHN and place 1st 2 sts from RHN back to LHN. Finally, k4 |
Abbreviations:
- St(s): Stitch(es)
- CN: Cable Needle
- Sl: Slip (as if to purl)
- K: Knit
- Ktbl: Knit through back loop
- P: Purl
- RHN: Right hand needle
- LHN: Left hand needle
Now you can practice your new skill while knitting these designs: Giza, Gothic Arches, Hyggelig, Walking through a vineyard, and Braidalot.
Good luck!
I also have a tutorial on knitting left leaning cables without a cable needle which you can find here.
Ready for the next step? Try working a 6 stitch cable without a cable needle using this tutorial. You can find an overview of my other tutorials here.
If you like this tutorial, please subscribe to my newsletter to hear about my latest blog posts, tutorials, and pattern releases. You can also follow me on Instagram or Facebook.
